I love loopers. Simple device that turns practice into endless loop fun!
While the idea of a looper is very simple, the result is amazingly fun and gives a lot of possiblities for creativity.
What is a looper
But ok, let’s start from the beginning. The looper is just a simple recording device that can record up to certain amount of time (from about 30 seconds to hours) and then play it back in a… loop. And then you can record over (often referred as overdubbing) and so on and so forth. Simple models just do that, more advanced models can de undo, redo, multiple channels, add effects, the list goes growth along with the price tag. Loopers come standalone and built-in in e.g. Multi-FX units.
Even a simplest modern looper will given you the essentials: ability to record (30-90 seconds), play in a loop and overdub, adjsut the level of the loop and most will also allow undoing the last record and reapplying it back. A simple search on Amazon gives you options from about 40 USD and up, the budget is the limiting factor. And of course you can always pick a used one, many are purchased on a whim and not used at all. You can save half of the price for just wiping out some old dust :).
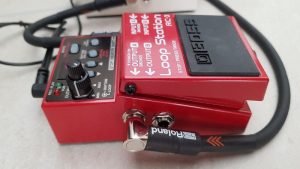
More complex devices like great Boss RC-30 or DigiTech Jam Man Stereo add more foot-switches (useful for live use, also see below), microphone inputs, effects aux inputs, ability to save (and load) separate tracks, etc.
How to operate
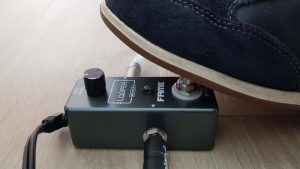
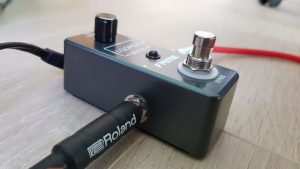
There are books and courses and some countless videos on YouTube on how to use loopers. But in essence the operation of a 1-button looper is rather simple (hey, it has only one button and a turn knob :)):
- Tap once to start recording
- Tap second time to stop recording and start playing recorded phrase (in a loop)
- Adjust the level of the playback using the turn knob
- Tap another time to start recording on top of the recorded phrase (overdubbing)
- While playing, press-hold to undo (if supported)
- While playing, press-hold again to redo (put back) the last deleted phrase (if supported)
- Double-tap to stop (pause)
- When stopped, press and hold to delete the phrase
Having additional buttons often simplifies the stopping part and adds functionality to e.g. switch between different loop phrases. Note that there are more advanced one-button loopers like Boss RC-3, which allow altering the behavior after the second tap: you can either go immediately into overdubbing mode (default) or start playing (easier most of the time).
Note that the last part (deleting) on a single-button looper has a side-effect: you will inevitably hear about two seconds of the loop before phrase really gets removed and everything stops again. Having dedicated buttons to stop helps avoiding unwanted sounds. As a hack you can first put the loop level completely down (left-most) and then stop-erase, but this would reaquire manipulating the knob with your hand. Well, the
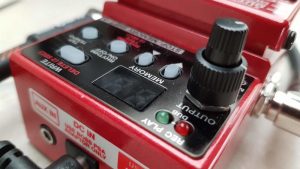
The recording mode of Boss RC-3 can be changed on Boss by powering off (take out the input instrument cable), holding the “Tap Tempo” button and while holding the button powering on again (insert instrument cable again). Then you can choose the mode from “rd” meaning record-then-overdub (default factory setting) or “rP” meaning record-then-play using the up/down buttons. Press the “Write” button to store your choice. The device will remember the choice next time you power it on!
Well, the trickiest parts are the timing of the first and second steps. You have to train yourself to tap at the same moment when you strum chord/pick your fist note to start recording. And then tap again on bar end. This comes with practice, so do not get discouraged from one or two failed attempts! A good trick is to start playing first, and then tap exactly at the start of the bar. Tap the button on the beat one! Last but not least, keep the tempo (especially on longer loops) using a metronome or rhythm machine (see below).
More advanced loopers have helping functions. Some allow recording mode when the loopers detects signal and then automagically starts recording. Some (like the Jam Man Stereo) also can “auto-quantize”, which means it will try to fix your mis-tapping based on the preset tempo to the correct timing. I would not start with that, you would limit yourself to the loopers that have this function and will not improve your “aim”, but the choice is yours!
When practicing with loopers I love to use the drum rhythms to keep the proper tempo. Some loopers have some simple rhythms built in (like the ones from Boss or DigiTech), some have somewhat wider choices (like Nux Core or MOOER Groove Loop). But if you want to go even further then you’re up to a standalong drum machine like Singular BeatBuddy or a “good ol'” Alesis SR-16 (see also my post on cheat sheet for Alesis!).
How to record
OK, so you can tap, you can strum, and then? Well, the beauty of the looper is that you can combine several tracks in one and in fact perform as a “band of yourselves” :). It can give you basis for your solo practice or let you record a complex melody comprising of several layers.
You have to try and listen to the resulting melody, but in general you want to split the melody in layers: e.g. low/bass, mid-chords, high/solo parts, switching effects (place them before the looper!) and don’t forget, you can also add some percussion sounds by either tapping on the guitar body (especially semi- or completely hollow ones) or “scratching” with nails or pick with strings muted. And last, but not least, if your looper allows, you can add some voice over (my kids love this part :)). In general as a rule of thumb: “stay away from previous layers”, do not mix the same range tones, keep layers distinct!
So the basic exercise may be laying down some chords (strum or arpeggios) and then soloing with your favorite minor pentatonic position over it :). It is simple, it works and it gives easy-to-start pleasing results (well, as experrience shows, this may vary from the performer to his/her spouse pretty wildly :)).
More complex one can be layering some rhythm (e.g. using power-chords), then filling-in with the chords using the middle strings and then adding solo on thinner strings. And as some experienced guys point out: you can also solo on lower strings as well!
You can also set the loop level such that it remains in background while you adding new parts or solor so that it mixes well together.
See also nice video of Paul Davids showing some amazing examples of what you can do with a looper:
This post contains affiliate links to the Amazon.com website. I will receive a small fee if you buy one of the products which will help me supporting this website. I appreciate your help!


